#️Raydium Liquidity Pool (Add Pool) Creation Guide
The best DEX on the Solana chain.
SlerfTools - Solana Toolkit Safe
open-source, providing the most convenient one-stop experience for Solana users.
Raydium is one of the largest decentralized exchanges on the Solana chain. Anyone can create a liquidity pool on it. Once the pool is created, trading can immediately occur on the Raydium swap interface.
Note: Before creating liquidity on Raydium, you must renounce (freeze) permissions;
otherwise, the creation will fail. Renounce permissions here >>> Revoke Authority on SlerfTools
Below is the tutorial for creating a pool on Raydium:
Obtain the OpenBook Market ID
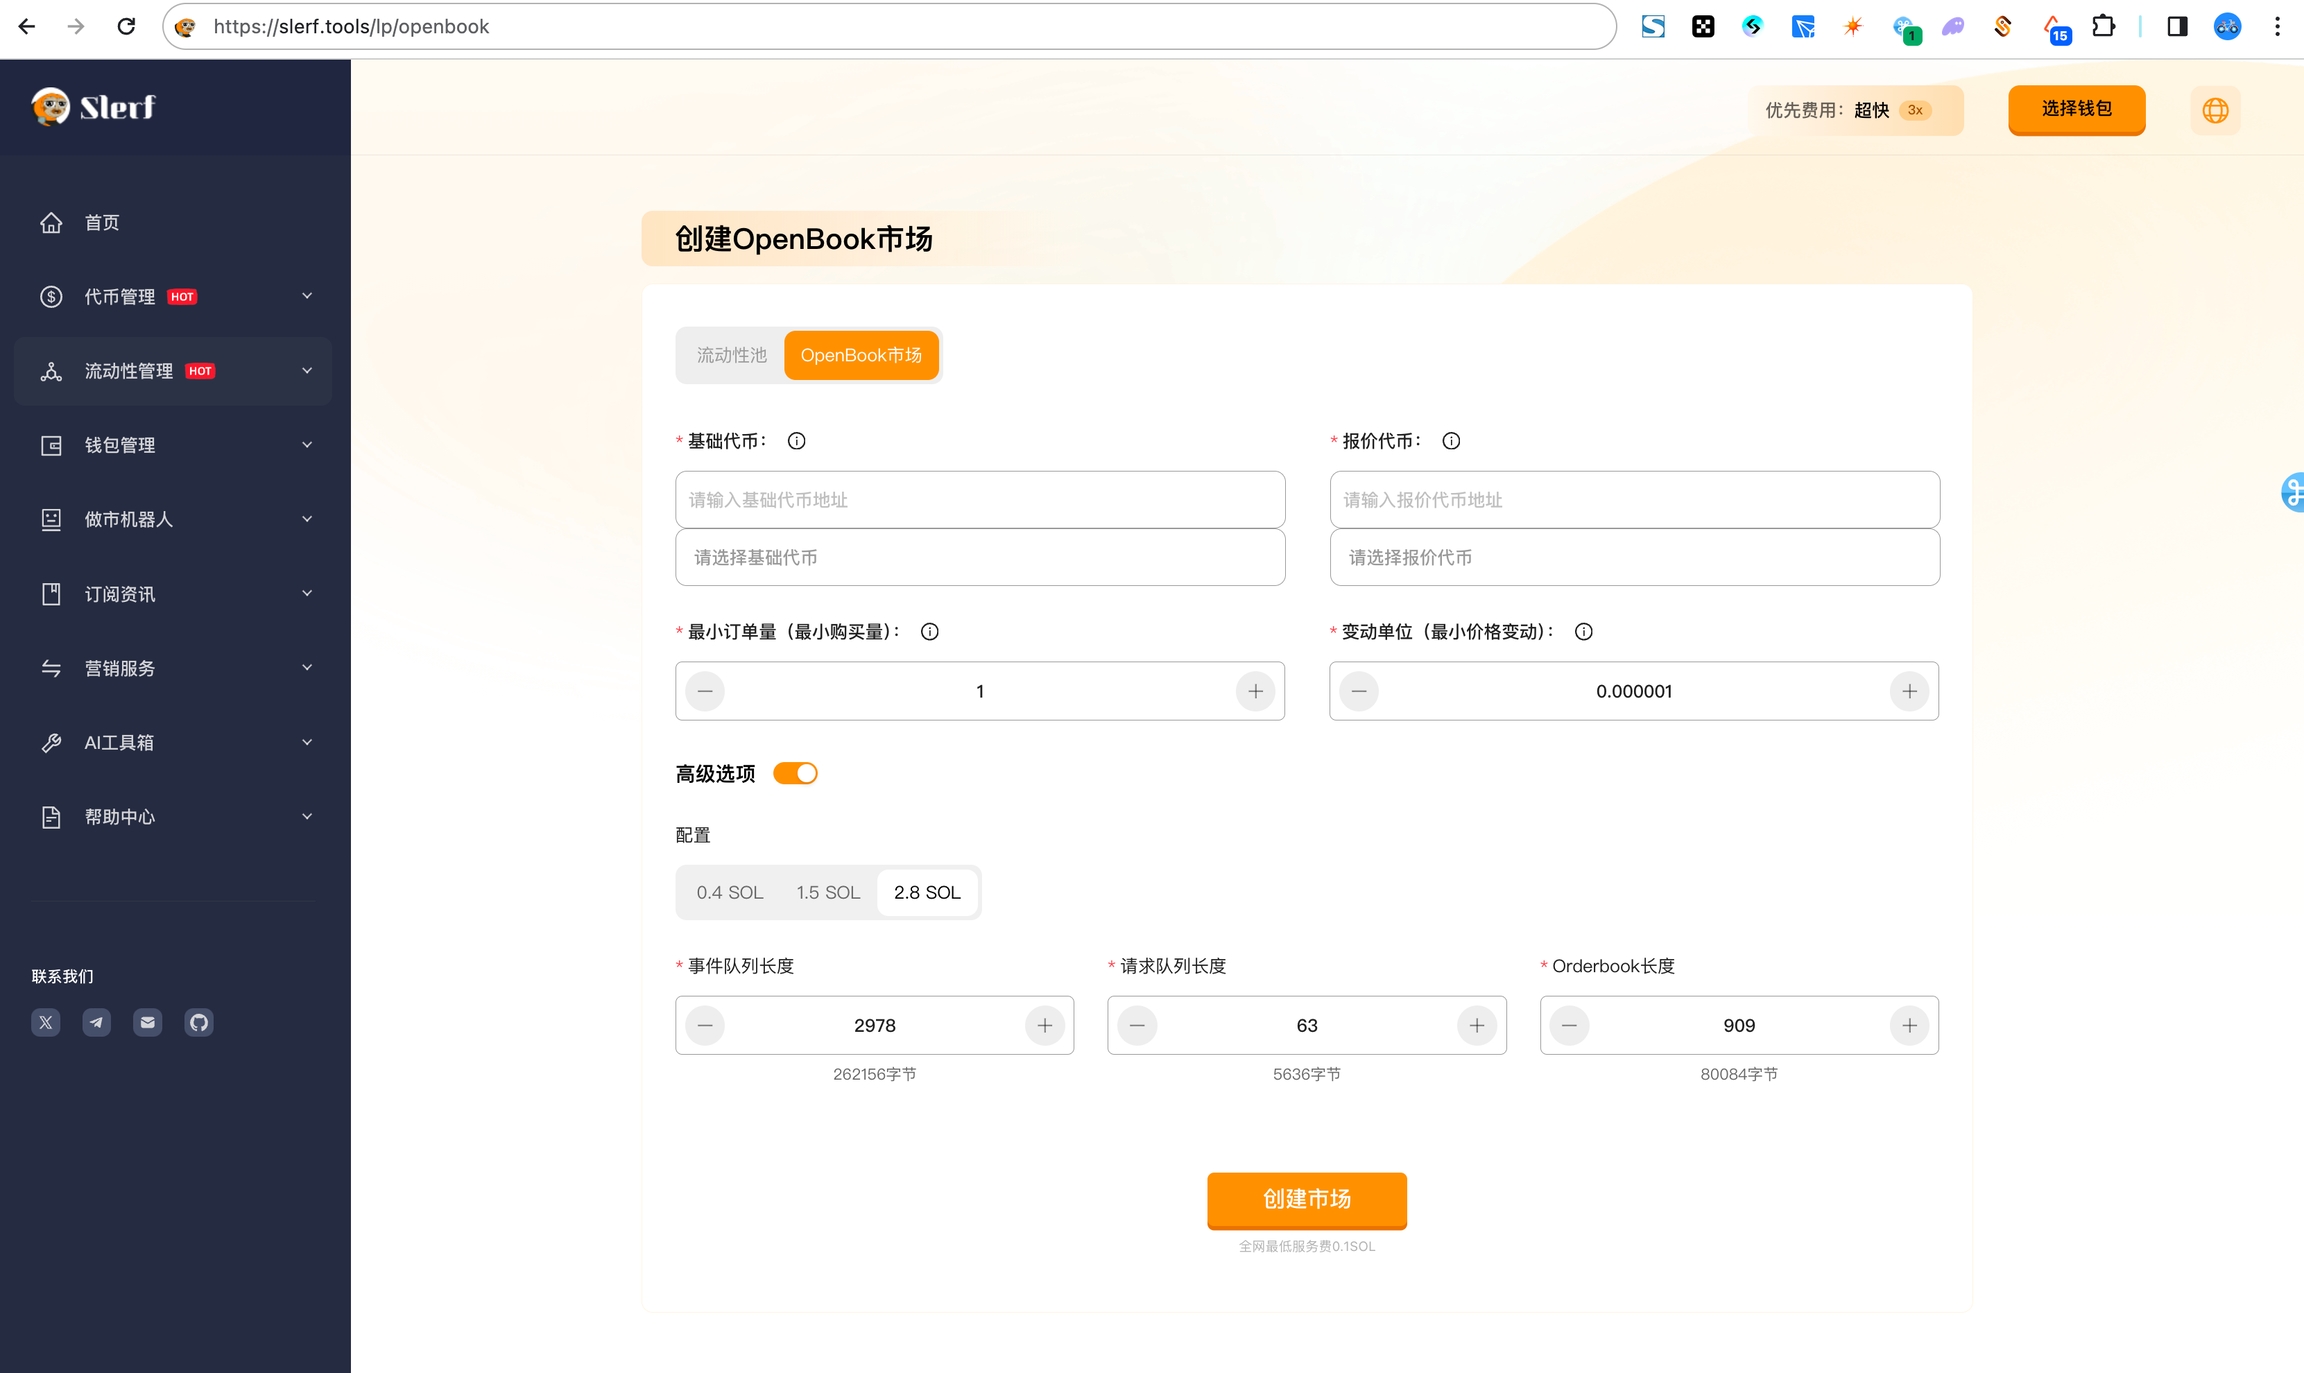
Create the OpenBook Market ID at this link: OpenBook Market ID Creation
Please note that the cost of creating an ID is approximately 0.55 to 3 SOL (each ID corresponds to a single trading pair and cannot be reused).

Base Token: Enter the contract address of your issued token.
Quote Token: Trading pair token, such as USDT, SOL, etc.
Minimum Order Quantity: Precision of the minimum order quantity in the order book. For example, if you enter 2, the minimum trading volume is 0.01. If you enter 4, the minimum trading volume is 0.0001. This represents the number of decimal places for precision.
Minimum Unit of Variation: The smallest price display/change in decimal places. For example, if you enter 3, the token price is displayed with 3 decimal places, such as 11.123. If you enter 5, the smallest token price is displayed with 5 decimal places, such as 11.12345.
Note: The sum of the minimum order quantity and the minimum unit of variation must not exceed the precision of the quote token.
Configuration Fee: Low configuration (suitable for general tokens), medium configuration (suitable for growth tokens), standard configuration (suitable for high-quality value tokens).
Event Queue Length: No need to adjust.
Add Pool
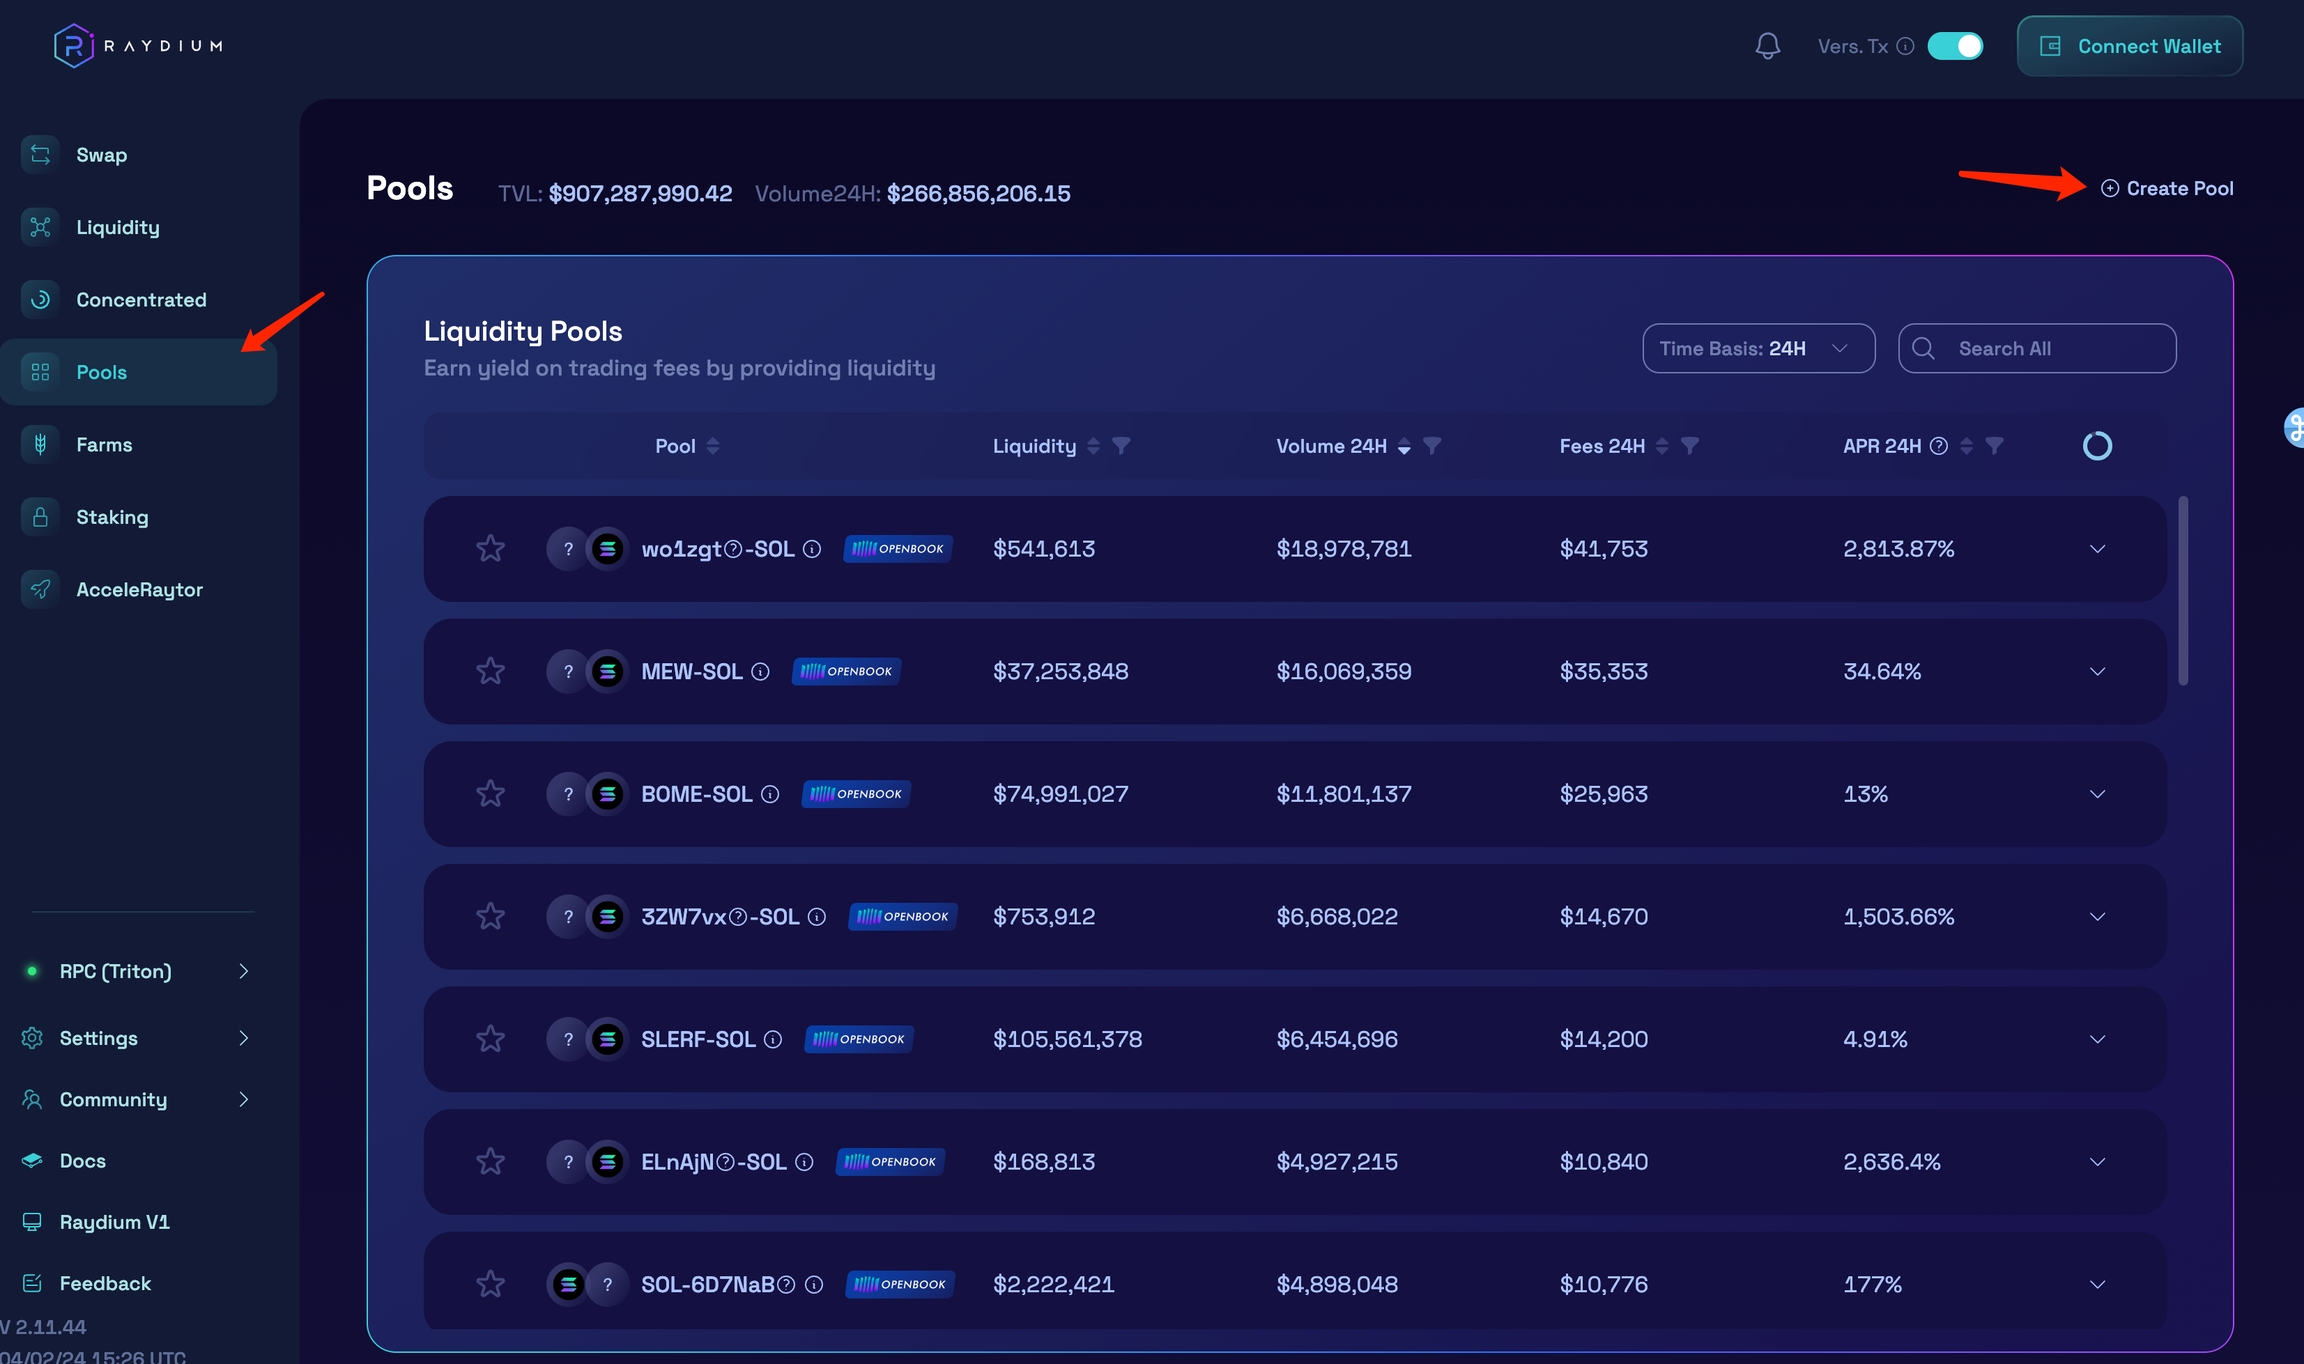
After creating the OpenBook Market, go to the Raydium liquidity page.
Click the "Create Pool" button in the top right corner.
Note: If you have not obtained an OpenBook Market ID, you will not be able to add liquidity.

Set Price and Ratio
Set the Initial Price of the Base Token: This is the amount of quote token required to purchase 1 base token.
Set the Initial Liquidity of Base and Quote Tokens: You can enter the initial liquidity for one token, and the other will be calculated based on the initial price of the base token.
Set the Start Date and Time for the pool to be activated.
Ensure You Have Sufficient Funds in your wallet for the initial liquidity, then click "Confirm and Initialize Liquidity Pool."
Important Note: Once you confirm and initialize the pool, you will no longer be able to edit the initial price, liquidity, or start time. Note that the start time is determined by the on-chain time.

After clicking confirm, you will need to approve two separate transactions in your wallet. These transactions will create the pool, create the AMM account and ID, and add liquidity from your wallet. If you do not see one of the transactions, check if your wallet window is hidden behind the main browser window. If you miss confirming a transaction, the process will fail, and you will need to click confirm again and reapprove all transactions.
Once you have confirmed the two transactions in your wallet, the new LP will be created, you will receive the new AMM ID, and the pool will start at the set launch time.
Remove Liquidity (Withdraw Pool)
No need to wait, you can remove added liquidity at any time using SlerfTools.
Remove Liquidity: https://slerf.tools/lp/remove
If you are sure that you have added liquidity, you can go to the Raydium page, select "Liquidity," and then scroll down to see your liquidity. (Currently, the Solana chain is very congested, and according to official statements, it may take up to 16 hours to see your liquidity, but this does not affect trading.)

Click on your liquidity to see several options such as add liquidity or trade. At this point, select "Remove Liquidity," as shown below:

Then enter the amount of LP you want to remove and click "Remove Liquidity." After confirming in your wallet, the liquidity will be removed. (If you select "MAX," it will remove all liquidity.)

That's the complete tutorial on adding/removing liquidity on Raydium.
If you have any questions, please join our Telegram group: https://t.me/SlerfTools for assistance. Thank you.
最后更新于
这有帮助吗?